
Cymbals are an integral part of any drum set, providing a distinctive sound and adding depth to the music. While there are many cymbals available on the market, crafting your own cymbals can be a rewarding and creative endeavor. In this article, we will guide you through the process of making cymbals, from selecting the right materials to shaping and finishing the final product. So, let’s dive in!
1. Introduction
Cymbals are percussion instruments made of metal alloys that produce a distinct ringing sound when struck. Traditionally, cymbals are made from bronze, a combination of copper and tin. However, modern cymbals can also incorporate other metals, such as silver or nickel. Crafting your own cymbals allows you to customize the sound, size, and aesthetics to suit your preferences.
2. Gathering the Necessary Materials
Metal Alloys
The choice of metal significantly affects the sound and quality of the cymbal. The most commonly used metals include:
- B20 Bronze: Comprising 80% copper and 20% tin, B20 bronze is favored for its rich, complex sound and is widely used in professional-grade cymbals.
- B8 Bronze: Made from 92% copper and 8% tin, B8 is harder and produces a brighter sound, suitable for mid-range cymbals.
- Brass: A less expensive option, used primarily for entry-level cymbals. It consists of copper and zinc and offers a brighter and more cutting sound.
Specific Treatments
- Nickel Silver: Occasionally used for beginner cymbals, this alloy includes nickel and provides a bright sound but lacks the complexity of bronze cymbals
3. Preparing the Metal
To start the cymbal-making process, follow these steps:
Step 1: Selecting the Metal
Choose the type of metal alloy you want to use for your cymbal. Bronze is the most common choice due to its rich sound and durability.
Step 2: Cutting the Metal
Using tin snips or metal shears, cut the sheet metal into the desired shape and size for your cymbal. Consider factors like diameter and thickness to achieve the desired sound.
Step 3: Shaping the Cymbal Blank
Using a hammer and anvil, shape the cut metal piece into a rounded disc. This will serve as the blank from which you will form your cymbal.
4. Shaping the Cymbal
Now that you have prepared the cymbal blank, it’s time to shape it into its final form:
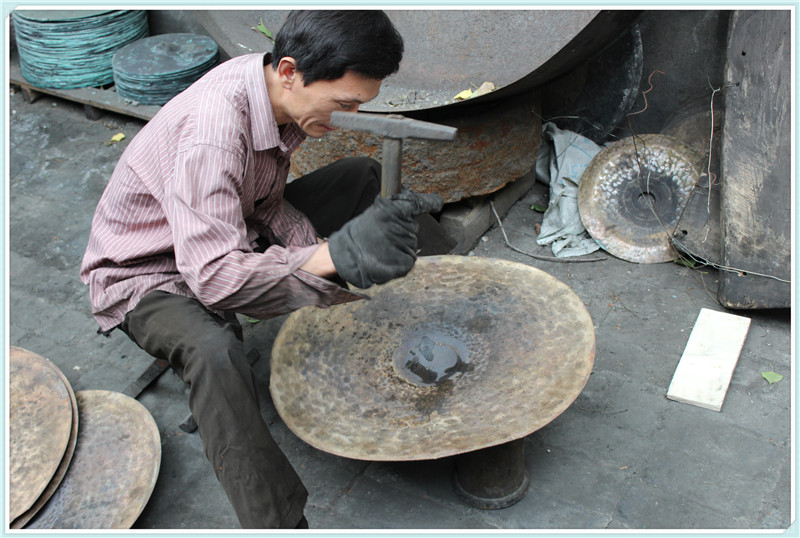
Step 4: Hammering the Cymbal
Place the cymbal blank on a soft surface and use a hammer to strike the edges. Gradually work your way around the circumference, shaping the cymbal and creating a slight curvature.
Step 5: Adding Bell and Holes
Using a metal punch or drill, create a bell in the center of the cymbal. You can also add small holes around the cymbal’s surface to enhance its sound and response.
5. Hammering and Lathing
Hammering and lathing are crucial steps in shaping the cymbal and defining its sound characteristics:
Step 6: Hammering the Cymbal
Using a specialized hammer or mallet, strike the cymbal repeatedly to create a series of dimples and ridges. This process, known as “hammering,” adds complexityand texture to the cymbal’s surface, which affects its sound projection and tonal qualities.
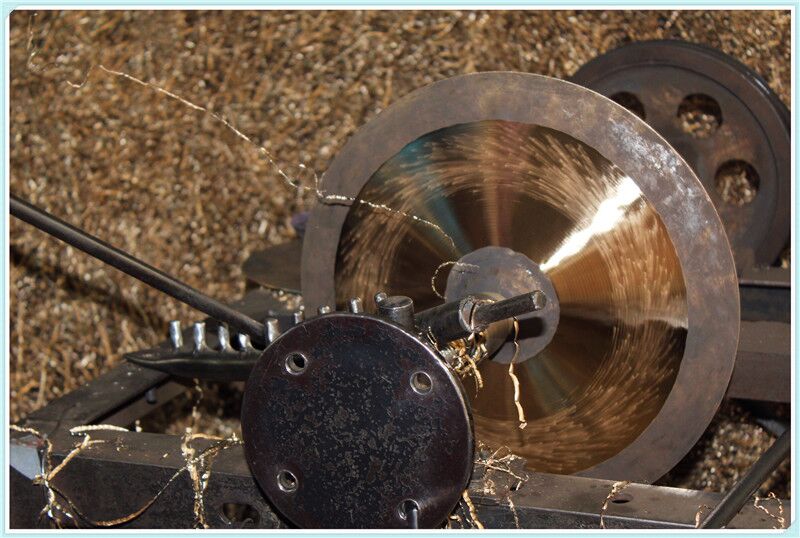
Step 7: Lathing the Cymbal
Next, use a lathing machine or a lathe to remove excess material from the cymbal’s surface. This process helps refine the shape, balance the weight distribution, and further shape the sound of the cymbal.
6. Toning and Tuning
Toning and tuning your cymbal is essential for achieving the desired sound characteristics:
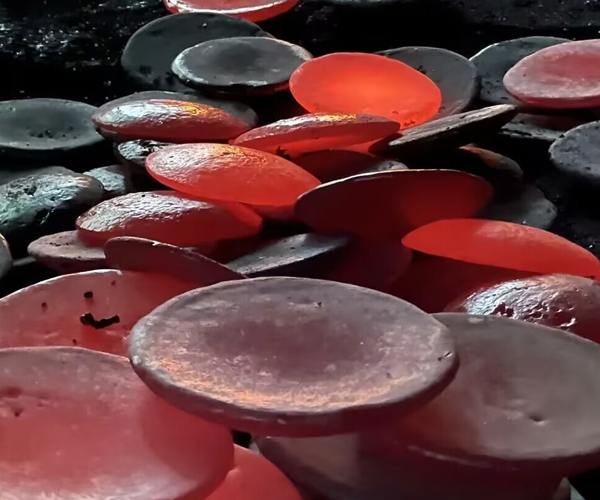
Step 8: Toning the Cymbal
To tone the cymbal, you can heat it using a torch or an oven. Applying heat alters the molecular structure of the metal, enhancing its tonal qualities. Experiment with different heating techniques to achieve the desired sound.
Step 9: Tuning the Cymbal
Tuning a cymbal involves finding its sweet spot and adjusting its pitch. You can accomplish this by striking the cymbal at different points and listening for the desired resonance. Fine-tune the pitch by adjusting the cymbal’s tension and positioning on the cymbal stand.
7. Polishing and Finishing Touches
After shaping and toning your cymbal, it’s time to give it a polished and finished appearance:
Step 10: Polishing the Cymbal
Use sandpaper or polishing compounds to remove any imperfections and create a smooth surface on the cymbal. Start with coarser grits and gradually move to finer grits for a polished finish.
Step 11: Adding Personalized Touches
This is the stage where you can add your personal touch to the cymbal. Consider engraving designs or adding logos to give your cymbal a unique identity.
Testing and Fine-tuning
Once you have completed the cymbal-making process, it’s crucial to test and fine-tune the cymbal to ensure optimal sound quality:
Step 12: Testing the Cymbal
Mount the cymbal on a cymbal stand and play it using drumsticks or mallets. Pay attention to its sound, sustain, and response. Make adjustments as needed to achieve the desired sound characteristics.
Step 13: Fine-tuning the Cymbal
If you’re not satisfied with the initial sound, you can further fine-tune the cymbal by repeating steps like hammering, lathing, or toning until you achieve the desired results.
9. Conclusion
Crafting your own cymbals can be a fascinating and fulfilling experience for drummers and percussion enthusiasts. By following the steps outlined in this guide, you can create unique cymbals tailored to your preferences and musical style. Experiment with different materials, shapes, and techniques to explore the vast possibilities of cymbal making.