
Introduction
If you’re a drummer or a music enthusiast looking to enhance your drumming skills, knowing how to assemble a hi-hat cymbal is a fundamental skill. The hi-hat is a crucial component of a drum set, creating that distinctive “chick” sound that adds rhythm and dynamics to music. In this guide, we’ll walk you through the process of assembling a hi-hat cymbal, ensuring that you’re ready to make some music!
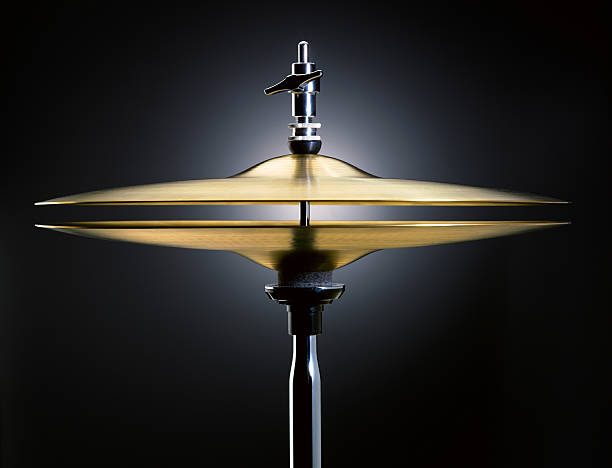
Understanding the Hi-Hat Cymbal
The hi-hat cymbal consists of two circular metal plates, the top cymbal and the bottom cymbal. These plates are attached to a hi-hat stand, allowing you to control their movement and create varying sounds by pressing a foot pedal.
Gathering the Necessary Tools
Before you start assembling, ensure you have the following tools handy:
- Hi-hat stand
- Hi-hat clutch
- Top cymbal
- Bottom cymbal
- Drum key
Step 1: Prepare the Hi-Hat Stand
- Unfold the Legs: Start by loosening the T-bolt on the hi-hat stand and unfold the legs to form a stable tripod base. Ensure the legs are spread out enough to provide stability without rocking.
- Insert the Radius Rods: If your stand includes radius rods, insert their bent ends into the designated holes at the bottom of the hi-hat frame.
Step 2: Assemble the Base and Upper Tube
- Attach the Upper Pull Rod: Securely thread the upper pull rod into the receiver at the base of the hi-hat stand.
- Slide the Upper Tube Over the Pull Rod: Remove the clutch from the pull rod, then slide the upper tube over it and into the base. Adjust the upper tube to about halfway up for now.
Step 3: Position the Bottom Cymbal
- Place the Bottom Cymbal: Identify the heavier of the two hi-hat cymbals, often marked as ‘Bottom’. Place this cymbal bell side down on the felt washer located on the seat cup of the stand.
- Adjust for Air-Lock: If your stand has an adjustment screw under the bottom cymbal, use it to slightly tilt the cymbal. This prevents air-lock, a condition where trapped air dampens the sound when the cymbals clap together.
Step 4: Attach the Top Cymbal to the Clutch
- Prepare the Clutch: Remove the metal lock nut and one felt washer from the clutch.
- Attach the Cymbal: Slip the clutch through the hole in the top cymbal. Replace the felt washer and the metal lock nut on the clutch1.
- Mount the Clutch: Slide the clutch, with the top cymbal attached, onto the pull rod.
Step 5: Adjust the Cymbal Spacing
- Set the Desired Distance: Space the cymbals about an inch apart. Tighten the wing screw on the clutch to secure this setting.
- Adjust Clutch Tension: The clutch may have lock nuts to adjust the “play” of the top cymbal. Loosen the top lock nut, adjust the bottom lock nut for desired play, then counter-turn the lock nuts to lock the setting.
Step 6: Final Adjustments
- Adjust Spring Tension: If applicable, adjust the spring tension of the hi-hat to your preference. This is usually done by a slider on the base section of the stand1.
- Rotate the Legs: If your hi-hat stand has swivel legs, rotate them as needed to accommodate any double pedals.
Step 7: Adjusting the Tension
- Press the hi-hat pedal down to close the cymbals.
- Experiment with different foot pressures to find the desired tension.
- Adjust the tension using the hi-hat stand’s tension knob until you achieve the desired “chick” sound.
Step 8: Test the Setup
- Check Stability and Sound: Press down on the pedal to ensure the hi-hat opens and closes smoothly and produces a crisp, clear “chick” sound. Make any necessary adjustments to the spring tension or cymbal spacing
When assembling a hi-hat cymbal, there are several common mistakes and issues that you should avoid to ensure optimal performance and longevity of your equipment. Here are some key points to consider:
Things you should avoid
1. Over-tightening the Clutch
Avoid over-tightening the clutch on the top hi-hat cymbal. Over-tightening can restrict the natural movement of the cymbal, leading to a stifled sound and potentially damaging the cymbal
6. It’s important to find a balance where the clutch is tight enough to hold the cymbal securely without restricting its movement.
2. Incorrect Cymbal Placement
Ensure that the bottom hi-hat cymbal is placed correctly on the hi-hat stand. The bottom cymbal should be slightly tilted to prevent air-lock, which occurs when the cymbals are too parallel and trap air between them, affecting the sound quality.
3. Ignoring Felt and Washer Placement
Do not forget to place the felts and washers correctly. These components protect the cymbals from direct metal-to-metal contact, which can lead to keyholing and cracking of the cymbals. Ensure that the felts are positioned on both sides of each cymbal, and the washers are placed beneath the felts to distribute pressure evenly.
4. Incorrect Spring Tension Adjustment
The spring tension on the hi-hat stand should be adjusted according to your playing style. Incorrect tension can make the hi-hat pedal either too hard or too soft to press, which can affect your playing technique and speed.
5. Not Checking for Loose Parts
Regularly check for any loose parts, such as the wing nuts or screws on the hi-hat stand. Loose parts can lead to instability and unexpected malfunctions during performance
6. Improper Hi-Hat Height Adjustment
Adjust the height of the hi-hat cymbals so they are comfortable to play. Setting them too high or too low can affect your playing posture and technique. Use the memory lock on the stand to save your settings for consistent setup.
7. Neglecting Regular Maintenance
Regular maintenance is crucial. This includes cleaning the cymbals and checking the hi-hat stand for any signs of wear or damage. Neglecting maintenance can lead to performance issues and reduced equipment life. By avoiding these common mistakes, you can ensure a better setup of your hi-hat cymbals, leading to improved performance and longevity of your drum kit components.
Conclusion
Assembling a hi-hat cymbal might seem daunting at first, but with practice, it becomes an essential skill for any drummer. By following these steps and fine-tuning your setup, you’ll be able to create the perfect rhythm and dynamic sound that the hi-hat brings to your music.