

Enhance Your Cymbal Sound Quality Today
Transform your drumming experience and unlock your musical potential with cymbals that deliver exceptional sound quality, professional performance, and lasting value. As dedicated cymbal manufacturers with decades of expertise in creating instruments that inspire musicians worldwide, we understand that superior sound quality forms the foundation of memorable musical performances. Whether you’re a developing student seeking your first professional-grade instruments or an established performer demanding the finest acoustic characteristics, enhancing your cymbal sound quality opens new possibilities for musical expression and artistic achievement.
Understanding What Defines Superior Cymbal Sound Quality
Sound quality in cymbals encompasses far more than simple volume or basic tonal characteristics. True cymbal excellence emerges from the intricate interplay of harmonic complexity, dynamic responsiveness, tonal balance, and acoustic projection that distinguishes professional instruments from ordinary percussion tools. When musicians experience superior cymbal sound quality, they discover new dimensions of musical expression that transform their performance capabilities and creative possibilities.
Professional cymbal sound quality begins with carefully selected bronze alloys that provide the foundation for complex harmonic development. Our B20 bronze, containing 80% copper and 20% tin, creates the rich overtone structures that serious musicians recognize as essential for sophisticated musical expression. This alloy composition enables cymbals to respond sensitively to subtle playing variations while producing the complex frequency interactions that define authentic acoustic character.
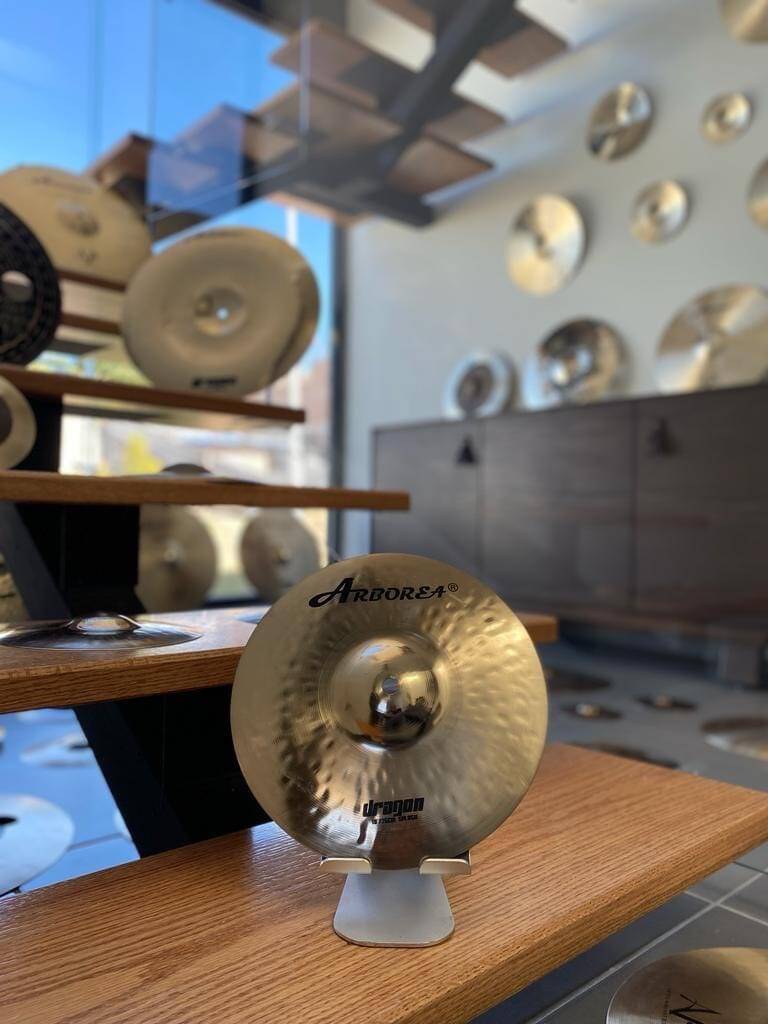
The manufacturing process significantly influences final sound quality through traditional hand-hammering techniques that create unique surface textures optimizing acoustic resonance. Each hammer strike contributes to the cymbal’s eventual tonal character, with master craftsmen applying decades of experience to develop instruments that sing with musical authenticity. This artisanal approach ensures that every cymbal possesses individual personality while meeting consistent quality standards that musicians depend upon for professional applications.
Identifying Your Current Cymbal Limitations
Many drummers unknowingly limit their musical potential by accepting inferior cymbal sound quality that restricts their expressive capabilities and undermines their performances. Recognizing these limitations represents the first step toward dramatic sound quality improvement that will enhance every aspect of your drumming experience.
Common indicators of poor cymbal sound quality include harsh, one-dimensional tones that lack the harmonic complexity needed for sophisticated musical expression. These cymbals often produce overwhelming volume without musical character, forcing drummers to compromise their dynamic range and limiting their ability to contribute meaningfully to ensemble performances. Additionally, inferior cymbals frequently exhibit poor sustain characteristics, either dying out too quickly or sustaining indefinitely without musical decay patterns.
Another significant limitation involves cymbals that respond inconsistently to different playing techniques, failing to reward skilled musicians with the tonal variations that define professional performance. When cymbals cannot differentiate between subtle stick touches and powerful crashes, drummers lose essential tools for musical communication and artistic expression. This limitation becomes particularly problematic in recording situations where cymbal inadequacies become magnified through studio monitoring and final production.
Dynamic limitations represent perhaps the most frustrating aspect of poor cymbal quality, as inferior instruments often sound acceptable at moderate playing levels but become harsh and unmusical when pushed to performance volumes. Professional musicians require cymbals that maintain their musical character across the full dynamic spectrum, from whisper-quiet ghost notes to overwhelming fortissimo passages that command attention without sacrificing acoustic beauty.
Immediate Enhancements Through Professional Cymbal Selection
Upgrading to professional-quality cymbals delivers immediate and dramatic improvements in sound quality that transform your drumming experience from the first moment you play them. Professional cymbals respond instantly to your playing technique with sensitivity and musical character that reveals new possibilities for expression and creativity.
The difference becomes apparent immediately through enhanced harmonic richness that adds depth and complexity to every cymbal strike. Where inferior cymbals produce simple, harsh sounds, professional instruments create layered harmonic structures that evolve throughout each note’s sustain period. This harmonic development provides the acoustic foundation for sophisticated musical expression that elevates your drumming from basic timekeeping to artistic communication.
Dynamic responsiveness improves dramatically with professional cymbals that reward skilled playing technique with appropriate sound variations. These instruments understand the difference between gentle ghost notes and powerful accents, responding with tonal changes that support musical phrasing and dynamic expression. This responsiveness enables drummers to participate more effectively in musical conversations with other ensemble members while maintaining appropriate balance and contribution.
Projection characteristics also enhance significantly when upgrading to professional cymbals designed for optimal acoustic performance. Superior instruments cut through ensemble arrangements without requiring excessive force, enabling drummers to maintain musical sensitivity while ensuring their contributions reach audiences effectively. This improved projection reduces physical strain while increasing musical impact, supporting longer practice sessions and more comfortable performance experiences.
Advanced Techniques for Optimizing Cymbal Sound Quality
Beyond selecting superior instruments, advanced techniques can further enhance cymbal sound quality and unlock additional expressive possibilities that distinguish exceptional performers from ordinary drummers. These techniques require understanding how cymbals respond to different playing approaches and how to optimize their acoustic characteristics for specific musical applications.
Stick selection significantly influences cymbal sound quality, with different tip materials and stick weights producing distinctly different tonal characteristics from the same cymbal. Wooden tips generally produce warmer, more complex tones with enhanced harmonic development, while nylon tips create brighter, more focused sounds with increased attack definition. Experimenting with various stick options reveals the full tonal palette available from professional cymbals and enables precise sound customization for different musical contexts.
Playing technique refinement represents another crucial factor in optimizing cymbal sound quality. The angle of stick approach, contact location, and follow-through motion all influence the resulting tone and harmonic content. Professional drummers develop sensitivity to these variables, using them consciously to create specific sounds that serve musical requirements rather than simply striking cymbals without consideration for acoustic results.
Cymbal positioning and mounting significantly affect sound quality through their influence on resonance patterns and harmonic development. Proper mounting allows cymbals to vibrate freely without restriction, enabling full acoustic potential to emerge. Conversely, over-tightened wing nuts or inappropriate stand positioning can dampen resonance and reduce sound quality dramatically, negating the benefits of superior instruments.
The Science Behind Superior Cymbal Acoustics
Understanding the acoustic principles underlying superior cymbal sound quality helps musicians make informed decisions about instrument selection and playing techniques that maximize their musical impact. Professional cymbals function as complex acoustic systems where bronze alloy composition, physical dimensions, and surface treatments interact to create specific harmonic characteristics and response patterns.
Bronze alloy composition provides the fundamental acoustic foundation through its influence on harmonic development and frequency response. Higher tin content, as found in our B20 bronze, creates more complex harmonic structures with rich overtone development that evolves throughout each note’s duration. This complexity enables cymbals to produce musical sounds rather than simple noise, supporting sophisticated musical expression and ensemble integration.
Physical dimensions including diameter, thickness profile, and edge characteristics determine projection patterns, sustain characteristics, and frequency emphasis that define each cymbal’s musical personality. Master craftsmen carefully balance these dimensions to optimize acoustic performance for specific applications, whether emphasizing quick attack for jazz applications or sustained power for rock performances.
Surface treatments through traditional hammering and lathing techniques create microscopic textures that influence harmonic development and tonal character. Hand-hammering produces irregular surface patterns that break up unwanted overtones while enhancing musical harmonics, creating the complex tonal character that distinguishes professional instruments from mass-produced alternatives.
Professional Setup Configuration for Maximum Sound Quality
Optimizing cymbal sound quality requires careful attention to setup configuration that allows instruments to perform at their acoustic potential while supporting comfortable playing technique and musical expression. Professional setup principles apply regardless of musical style or performance context, providing the foundation for exceptional sound quality in any application.
Cymbal spacing and positioning significantly influence both sound quality and playing efficiency, with proper configuration enabling smooth technical execution while maximizing acoustic projection. Cymbals positioned too close together create interference patterns that muddy the overall sound, while excessive spacing forces awkward playing motions that compromise technical accuracy and musical flow.
Stand selection and adjustment directly impact cymbal sound quality through their influence on resonance and vibration patterns. Professional-quality stands provide stable support while allowing cymbals to vibrate freely, whereas inferior stands can introduce unwanted damping or vibration that degrades acoustic performance. Additionally, proper height adjustment ensures comfortable playing angles that support efficient technique and consistent sound production.
Cymbal tilting and angling affect both sound projection and stick rebound characteristics, with optimal positioning supporting natural playing motions while directing acoustic energy toward audiences effectively. Slight forward tilting generally improves projection while providing better stick access, but excessive angling can create awkward playing positions that compromise technique and sound quality.
Recording and Live Performance Optimization
Enhancing cymbal sound quality for recording and live performance applications requires understanding how different acoustic environments and audio systems interact with cymbal characteristics. Professional cymbals that sound exceptional in practice rooms may require optimization techniques to achieve similar results in recording studios or live venues with challenging acoustics.
Recording environments benefit from cymbals with controlled sustain characteristics that provide clear definition without overwhelming other instruments in dense musical arrangements. Studio applications often favor cymbals with complex harmonic content that adds richness to recordings without requiring excessive processing or artificial enhancement. Professional cymbals designed for recording applications maintain their acoustic character through various microphone positions and mixing approaches.
Live performance venues present different challenges where projection and cutting power become essential for maintaining musical clarity in high-volume environments. Cymbals that excel in live applications cut through amplified instruments effectively while maintaining musical character that supports ensemble balance. Professional performers often maintain separate cymbal sets optimized for studio and live applications, recognizing that different environments reward different acoustic characteristics.
Sound reinforcement systems can either enhance or compromise cymbal sound quality depending on microphone selection, placement, and processing techniques. Professional cymbals respond well to quality microphones positioned appropriately, while inferior instruments often sound harsh or unmusical when amplified. Understanding these interactions enables musicians to optimize their cymbal selections and setup configurations for specific performance contexts.
Maintenance Practices That Preserve Sound Quality
Maintaining superior cymbal sound quality requires consistent care practices that preserve acoustic characteristics while extending instrument life and performance reliability. Professional cymbals represent significant investments that reward proper maintenance with decades of exceptional performance, making care practices essential for protecting both sound quality and financial investment.
Regular cleaning removes accumulated dirt, stick residue, and oxidation that can dampen resonance and compromise acoustic performance. Professional cleaning techniques use appropriate materials and methods that clean effectively without damaging bronze surfaces or altering acoustic characteristics. Avoiding abrasive cleaners and harsh chemicals preserves the delicate surface treatments that contribute to superior sound quality.
Proper storage protects cymbals from physical damage and environmental factors that can degrade acoustic performance over time. Professional storage solutions provide adequate support while preventing contact between cymbal surfaces that could cause scratches or dings. Additionally, controlling humidity and temperature variations helps maintain consistent acoustic characteristics and prevents premature aging or deterioration.
Playing technique awareness helps prevent unnecessary wear and damage that can compromise sound quality permanently. Understanding appropriate striking techniques and avoiding excessive force preserves cymbal integrity while ensuring optimal acoustic performance throughout the instrument’s service life. Professional drummers balance expressive playing with instrument care, achieving maximum musical impact while protecting their investment.
Investment Value and Long-Term Benefits
Superior cymbal sound quality represents an investment in musical development and performance capability that provides returns far exceeding the initial cost through enhanced playing experiences, improved performance opportunities, and maintained resale value. Professional cymbals support musical growth by providing the acoustic foundation necessary for developing sophisticated playing techniques and musical expression.
Quality cymbals maintain their acoustic characteristics and market value over decades of use, making them sound financial investments in addition to musical tools. Unlike inferior instruments that deteriorate quickly and require frequent replacement, professional cymbals actually improve with playing as they develop seasoning that enhances their acoustic character. This longevity makes quality cymbals more economical than cheaper alternatives that provide short-term savings but require frequent replacement.
Professional opportunities often depend on acoustic quality that meets industry standards and musician expectations. Recording studios, professional ensembles, and educational institutions typically require instruments that deliver consistent, professional-grade sound quality. Investing in superior cymbals opens doors to opportunities that inferior instruments would preclude, supporting career development and musical advancement.
Taking Action to Transform Your Sound Today
Enhancing your cymbal sound quality begins with a single decision to prioritize acoustic excellence over convenience or cost-cutting that ultimately limits musical potential. Professional cymbals provide immediate improvements that transform your playing experience while supporting long-term musical development and performance opportunities.
Evaluating your current cymbal setup honestly reveals areas where sound quality improvements would provide the greatest musical benefit and playing satisfaction. Consider which cymbals in your current setup limit your musical expression or fail to support your playing technique adequately. These instruments represent the best candidates for immediate upgrade that will provide noticeable improvements in sound quality and playing experience.
Planning your cymbal enhancement strategy ensures that improvements align with your musical goals, playing style, and performance requirements. Whether focusing on a complete setup overhaul or systematic individual upgrades, strategic planning maximizes the musical impact of your investment while ensuring compatibility between new and existing instruments.
Our Commitment to Your Musical Success
As cymbal manufacturers dedicated to musical excellence, we understand that superior sound quality forms the foundation of exceptional musical performance and artistic satisfaction. Our instruments represent the culmination of traditional craftsmanship, modern technology, and deep understanding of musicians’ needs across all styles and skill levels.
Every cymbal we create undergoes rigorous quality control that ensures consistent acoustic performance and musical character that musicians can depend upon for their most important performances. Our craftsmen combine centuries-old techniques with modern quality systems to produce instruments that meet the highest professional standards while providing the reliability and consistency that serious musicians require.
We support our instruments with comprehensive customer service that helps musicians optimize their cymbal selections, setup configurations, and maintenance practices for maximum sound quality and playing satisfaction. Our technical experts provide guidance on everything from basic care procedures to advanced optimization techniques that unlock the full potential of professional cymbals.
Transform Your Musical Experience Starting Now
The journey toward superior cymbal sound quality begins with your commitment to musical excellence and acoustic authenticity. Professional cymbals provide the foundation for musical expression that inspires creativity, supports technical development, and enables memorable performances that connect with audiences on emotional levels.
Contact our cymbal specialists today to discuss your specific requirements, musical goals, and performance applications. Our experts will help you identify the optimal instruments for your playing style while providing guidance on setup optimization, maintenance practices, and techniques that maximize sound quality and musical impact.
Your musical potential awaits realization through cymbals that deliver the sound quality, responsiveness, and acoustic character that transform ordinary drumming into extraordinary musical expression. Take the first step toward enhanced sound quality today and discover how professional cymbals can elevate every aspect of your musical journey.
Experience the difference that superior cymbal sound quality makes in your playing, your performances, and your musical satisfaction. Invest in instruments that support your artistic vision while providing the acoustic foundation for musical excellence that lasts a lifetime. Your music deserves nothing less than the finest cymbals available, and your audiences will appreciate the difference that quality makes in every performance.